Hello, aspiring artists! As a passionate drawing instructor at Art Of Pencil, I’m thrilled to guide you through this quick and simple lesson. Grab your pencil and paper—let’s dive right in and create a graceful swan together.
Step-by-Step Guide to Drawing a Swan
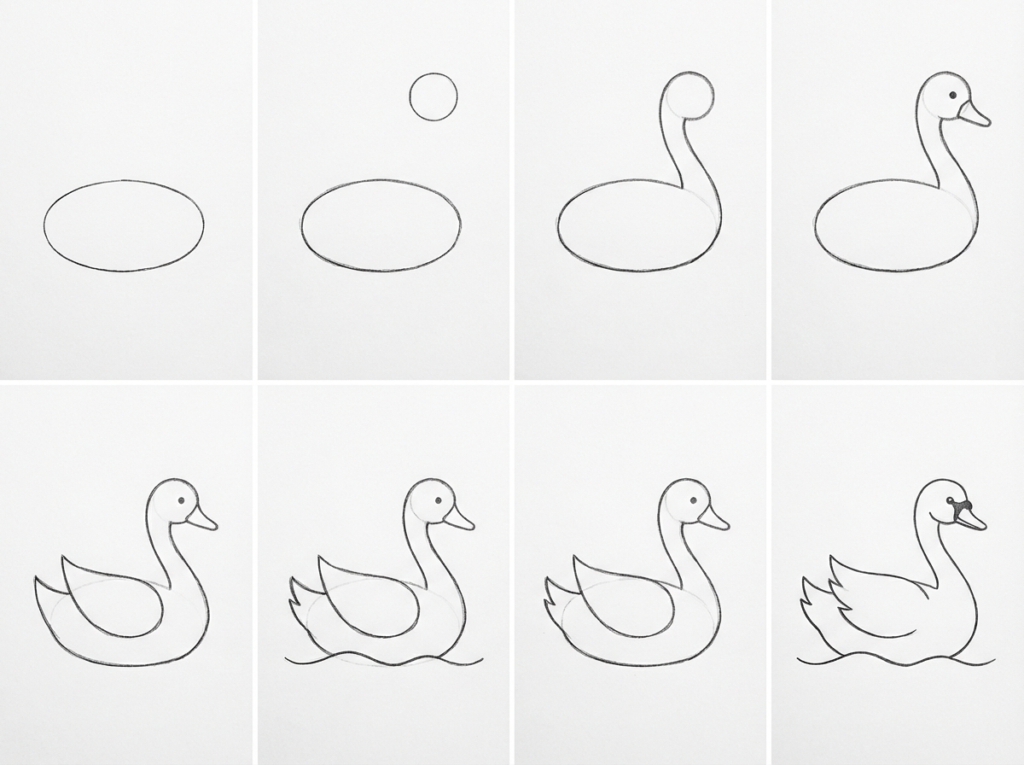
This easy tutorial is designed for beginners and kids, making it fun and fast to complete in just a few minutes. We’ll break it down into clear stages, using basic shapes to build your swan step by step. Remember, practice makes perfect, so don’t worry if your first try isn’t flawless—each stroke builds your skills!
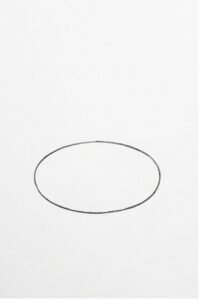
Step 1: Draw the Body Oval
Start with the foundation of your swan’s body. Lightly sketch a horizontal oval in the center of your paper. This will form the main torso. Keep it simple and elongated, like an egg lying on its side, to capture the swan’s sleek form.
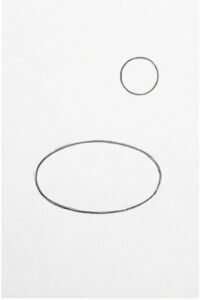
Step 2: Add the Head Circle
Next, position a small circle above and slightly to the right of the oval—this will be your swan’s head. Make sure it’s smaller than the body oval, about one-third the size, to maintain proportion. Imagine it floating gracefully atop the neck we’ll add soon.
Step 3: Connect with the Curved Neck
Now, draw a smooth, curved line connecting the head circle to the body oval. This creates the iconic long neck of the swan. Curve it gently like an “S” shape for that elegant arch, ensuring it flows naturally from the front of the body to the bottom of the head.

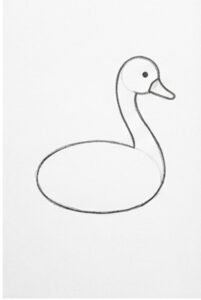
Step 4: Add the Beak and Eye
Refine the face by adding a small triangular beak extending from the front of the head circle. Keep it pointed and simple. Then, place a tiny dot inside the head for the eye, right near the beak’s base. This brings your swan to life with minimal details.
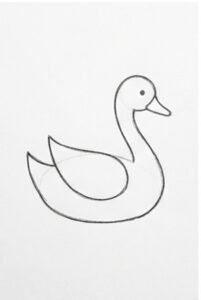
Step 5: Include the Tail and Wing
At the back of the body oval, add a short, upward-curving tail like a small flick. Then, on the side of the body, sketch a teardrop-shaped wing overlapping the oval slightly. Position it midway along the body for balance, keeping the lines soft and rounded.
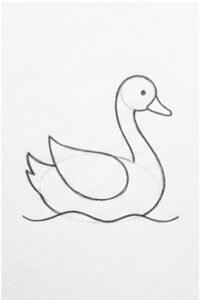
Step 6: Draw the Water Line
To set the scene, add a gentle, wavy line beneath the swan’s body to represent water. Make it horizontal and subtle, just touching the bottom of the oval. This gives the impression your swan is gliding peacefully on a pond.
Step 7: Erase Guidelines
Take a moment to clean up your drawing. Gently erase any overlapping or unnecessary lines inside the shapes, like parts of the original oval and circle that are no longer needed. This step sharpens the outline and makes your swan look polished.
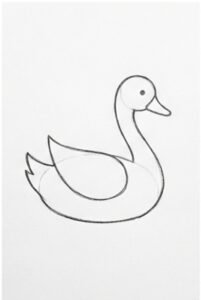
Step 8: Finalize the Clean Outline
Go over your remaining lines with a firmer pencil stroke to define the clean contour. Ensure everything flows smoothly—the neck’s curve, the body’s shape, and the small details. Congratulations! You’ve completed a charming swan drawing.
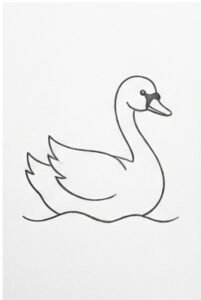
There you have it, my talented students—a delightful swan ready to adorn your sketchbook. This quick lesson shows how basic shapes can transform into art. If you enjoyed this, try varying the neck’s curve for different poses. Keep drawing, and I’ll see you in the next Art Of Pencil tutorial! ✏️🦢
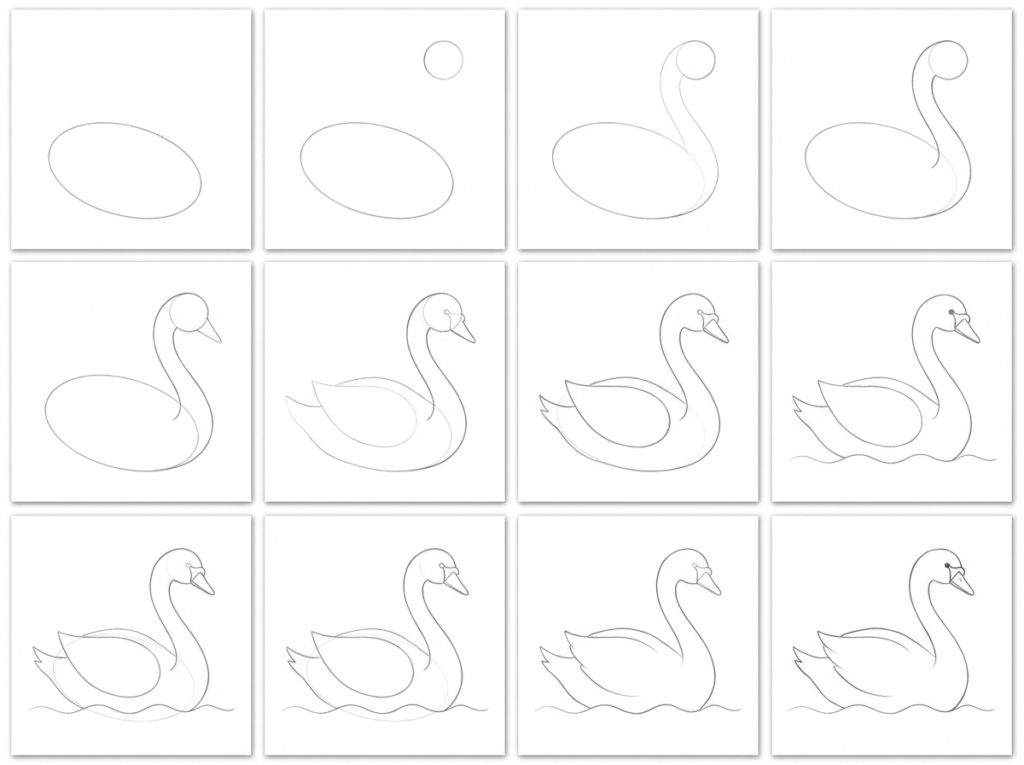
Another detailed guide on how to draw a swan easily
If the previous lessons seemed short, then take a look at this 12-step version.